


Imagine stepping into a scene from your favorite fantasy novel. An enchanted cloak swirls around a character, defining their mystery and power. This iconic imagery isn’t confined to pages. It recently dominated the world’s most exclusive runways.
Designers like Elie Saab and Zuhair Murad showcased capes and hoods as central, transformative pieces in their haute couture collections. These garments deliver instant drama and a regal silhouette. They prove that a single layer can redefine an entire look.
Now, that instant glamour is within your reach. You don’t need a sewing machine or years of training. This guide is your gateway to creating a stunning no-sew cloak or hood. We bridge the gap between high-fashion fantasy and accessible, hands-on creation.
We will explore various styles, from flowing elven mantles to structured warrior hoods. You’ll learn simple construction techniques using everyday materials. We’ll also show you how to style your new piece for maximum impact. Get ready to wrap yourself in a whirlwind of personal style.
Measuring & Simple Pattern Math
Creating a cloak that looks like it was made in a factory starts with precise measurements and simple math. This stage is key. It turns a piece of fabric into a garment that fits you perfectly.
Good proportions are essential for any well-made piece, fantasy or real. For example, a tall and heavy character needs a different cape size than a petite person. Start with accurate measurements.
You’ll need a soft measuring tape and a friend for the best results. Write down these three numbers:
- Neck Circumference: Measure around your neck where the cloak will sit. Add 2 inches for comfort and closure.
- Shoulder to Wrist: Measure from the top of your shoulder to your wrist. This tells you where the sleeve will end.
- Desired Cape Length: Measure from your neck down to where you want the hem. Aim for the calf or ankle for drama.
Understanding Cape Geometry
No-sew capes are based on circles and half-circles. A full-circle fleece cape offers lots of swirl. A half-circle cape uses less fabric and drapes elegantly.
The math is simple. For a circle cape, the radius is your desired length. The neck hole is a smaller circle cut from the center.
For a 40-inch long cape, your radius is 40 inches. For a 16-inch neck hole, the radius is about 3 inches. This is based on Circumference = 2πr.
You don’t need to be a mathematician. Just understand these basics. Use a string and pencil to draw your circle. Mark the neck circle in the center. Cut out the inner circle and a straight line for the front opening. Your pattern is ready.
This method lets you control the fit. You can make it for a child or an adult. Clear planning makes crafting easy and ensures a great fit.
Fabric Selection (Fleece, Knits, Satin) and No‑Sew Edge Finishes
Designers like Zuhair Murad and Elie Saab pick fabrics for drama and movement. This lesson helps with no-sew projects. They use satin for shine, velvet for depth, and crinoline for volume.
Your fabric choice is key. It affects how your cloak looks and feels. It also decides if you can get a polished look without sewing.
For no-sew cloaks and hoods, three fabrics stand out. Each has its own benefits for different characters and settings.
- Fleece: It’s warm, soft, and doesn’t fray. Great for wizard robes or winter costumes. But, it doesn’t flow like other fabrics.
- Knits (Jersey, Sweatshirt Fabric): These fabrics move well. They’re perfect for active characters like elves. Knit edges can be left raw but may curl. A rolled hem with fabric glue can clean up the look.
- Satin (Costume/Polyester): It adds luxury and magic. Satin looks great in light and is perfect for no-sew edges. Use fusible tape or glue for a clean finish.
Explore beyond the basics for inspiration. Chanel’s glittering tweed adds sparkle. Velvet suggests royal capes, and sheer silks hint at fairy wings. Let high fashion inspire your no-sew projects using easy materials.
The secret to a pro-looking no-sew cloak is in the edges. Here’s how to finish them right:
Fabric Glue: Use a clear, flexible glue. Apply a thin line along the edge, fold it, and press. This works well for satin and knits. For fleece, glue can attach trims or create fringe.
Fusible Hem Tape (Stitch Witchery): This tape melts with an iron to bond fabric. Place it in a folded hem, cover with a cloth, and iron. It’s great for satin and light knits.
Fringe: Embrace the raw edge. For satin or chiffon, make small cuts along the hem. No sealing needed—the look is intentional and stunning.
Rolled Hem: Roll the edge of lightweight knits and satins to hide the raw edge. Secure with fabric glue. This gives a delicate, finished look.
Your fabric and finish choices shape your cloak’s look. Stiff fleece makes a bold hood, while drapey knit frames the face softly. Planning your hood pattern starts with your material. The right mix makes your creation stunning and magical.
Closures: ribbon ties, toggles, snaps, frogs
A closure does more than just hold your cape shut. It serves as a focal point and dictates how the garment moves and fits. For a no-sew project, the right closure combines easy installation with personal style. This choice transforms a simple drape into a finished, wearable piece of fantasy flair.

Let’s compare the four most popular no-sew options. Each brings a different mix of ease, security, and decorative charm to your circle cape.
Ribbon Ties are the most forgiving and beginner-friendly option. Simply attach lengths of sturdy ribbon (grosgrain or satin) to the cape’s front edges using strong fabric glue or by threading them through grommets. They offer adjustable fit and a soft, romantic look. The bow itself becomes a decorative element, much like the “bows-as-buckles” seen in high fashion.
Toggles and Snaps provide a more secure hold. A wooden or horn toggle can be glued to one side, with a loop of cord or leather on the other. Heavy-duty snap fasteners, applied with a simple hand tool, offer a nearly invisible closure. Both are excellent for active wear, keeping the cape firmly in place during movement.
Frogged Closures bring elegant, vintage appeal. These intricately knotted cord fasteners are often purchased pre-made. You can glue the frog’s base directly onto the fabric. They create a beautiful, ornate detail on the front, echoing the intricately detailing found on designer garments. A frogged closure gives a cape a sophisticated, finished appearance.
Your choice directly shapes the cape’s silhouette. A circle cape with a secure toggle or a series of snaps will have a wrapped, close-to-the-body fit. Using ribbon ties allows for a more open, flowing drape that can be adjusted on the fly. Frogs typically hold firmly at one central point, creating a elegant bloused effect.
| Closure Type | Installation (No-Sew) | Hold Security | Aesthetic | Best For |
|---|---|---|---|---|
| Ribbon Ties | Glue or Grommets | Adjustable, Medium | Romantic, Soft | Beginner projects, adjustable fit |
| Toggles | Glue (toggle & loop) | Very Secure | Rustic, Functional | Active wear, windy conditions |
| Snaps | Hand-Press Tool | Very Secure | Clean, Minimalist | Streamlined look, frequent fastening |
| Frogs | Glue (pre-made) | Secure | Ornate, Vintage | Elegant or ceremonial capes |
Think about how you’ll wear your cape. For quick costume changes, snaps or a single toggle are fastest. For a dramatic reveal, untie a large ribbon bow. The closure is your final, functional flourish. It ensures your creation is not only beautiful but also practical to wear.
Embellishments: appliqués, stencils, trims, glow thread
A plain cape is like a blank canvas, ready for your unique touch. This is when your no-sew project turns into a personalized masterpiece. With easy, adhesive methods, you can add detailed touches that look like they came from a high-fashion runway.
Fabric glue is a powerful tool for adding no-sew embellishments instantly. It sticks a variety of decorations securely without sewing. You can use pre-made appliqués, delicate lace, dramatic fringe, and beaded border trims.
The half-circle cape is a great canvas for these decorations. Adding a trim along the hem gives it a polished look with a big impact.
Fabric paint and stencils let you unleash your creativity. You can paint stars, mystical symbols, or flowers right on the fabric. For a magical glow, use glow-in-the-dark fabric paint or glow thread woven into the fabric.
Take inspiration from famous designers like Elie Saab and Zuhair Murad. They use nature themes and web-like patterns. You can use fabric glue, iron-on patches, and metallic paints to create your own half-circle cape.
This method shows that anyone can create stylish DIY costumes. Start with a simple technique and let your creativity lead to a stunning result.
Learn more about creative DIY costumes and how to make them stylish and unique.
Kids vs Adult Sizing & Movement
Designing a child’s cloak and an adult’s cape are very different. They need to fit right and move well. You want the garment to feel natural and free for its wearer.
Designing for Young Adventurers
For kids, the cape is all about play and dreams. Safety and ease are key. Start with a smaller version of the pattern.
A shorter cape is best. It should sit between the shoulder blades and the waist for little ones. Older kids can wear it just below the waist. This keeps them safe while they run or play.
Choose simple, adjustable closures. Ribbon ties are great for this. They fit over winter clothes and can be quickly undone if the cape gets caught.
Here are some tips for kids’ capes:
- Make the neckline wide for easy putting on and taking off.
- Use light fabrics that won’t weigh kids down.
- Make sure all decorations are tight to avoid choking.
- Use ribbon ties or big snaps instead of hard toggles.
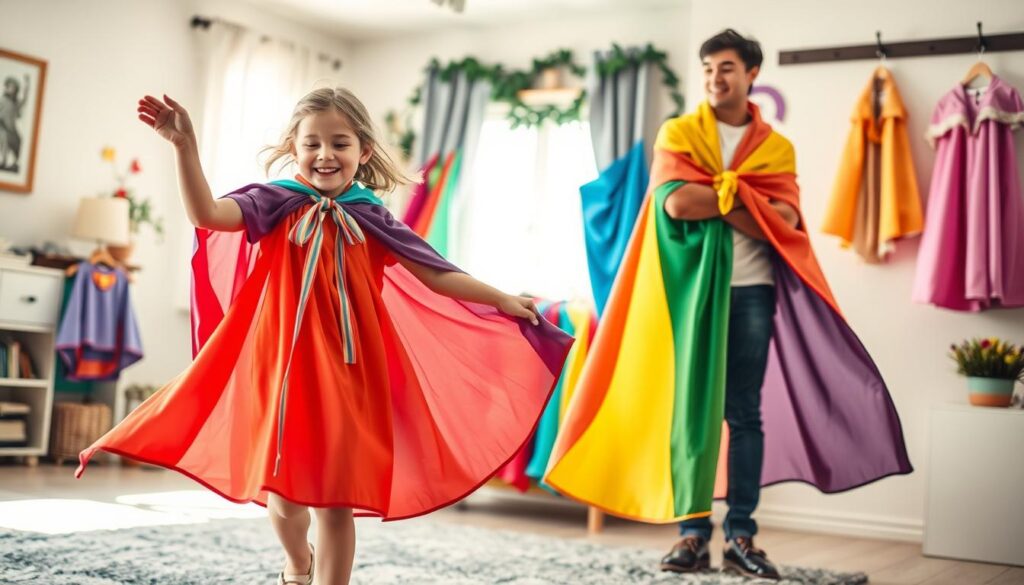
Adult capes focus on style and movement. They should be a stylish layer, not a costume. Simon, who is 6’3″, likes shirts that are a bit loose to feel the breeze.
This guides adult cape design. The fabric should be cut to flow and allow arm movement. The length can be longer, like calf or floor-length, because adults move better. The goal is a cape that moves with you.
Avoid tight designs on the shoulders or chest. They restrict movement and spoil the look. The closure should be secure but not tight. Frogs, toggles, or a simple pin work well for adults.
| Design Aspect | Child Cape Focus | Adult Cape Focus |
|---|---|---|
| Primary Goal | Safe, playful imagination | Sophisticated style and drama |
| Ideal Length | Above waist to just below waist | Mid-thigh to floor-length |
| Recommended Closure | Ribbon ties (for quick adjustment & release) | Toggles, frogs, or decorative pins |
| Fabric Drape | Lightweight, less bulk | Heavier, flowing for a elegant silhouette |
| Movement Priority | Unhindered running and play | Full, graceful range of motion for arms |
Whether for a child’s playtime or an adult’s event, the right fit is key. By making your cape fit well, you ensure it brings joy, not trouble.
Safety Notes (Visibility, Tripping Length)
Before your character takes the stage or your child goes on an adventure, some key safety checks are important. These ensure the cape adds to the fun without risks. A good costume balances drama with safety.
A long, flowing cape is tempting. But, a floor-length cape can be a tripping hazard, more so on stairs or uneven ground. A cape that hits at the calf or just below the knee is safer. It allows for grand movements without the risk.
Visibility is also key. Dark fabrics, perfect for mysterious characters, can be hard to see in low light. Adding reflective tape or using light fabrics like silver, light grey, or cream makes evening events safer.
A secure closure is not just for looks; it’s a safety must. A well-made toggle clasp keeps the cape in place. This is better than loose ties that can come undone or get tangled.
Here are some simple tips to make your design safe from the start:
- Test the Length: Have the wearer walk, sit, and climb stairs while wearing the cape. There should be enough space from the ground in all positions.
- Prioritize Secure Closures: Choose strong fastenings like a toggle clasp or sturdy snaps over simple ribbons for active play.
- Add Reflective Elements: Sew or fuse reflective trim in a contrasting color for a stylish, safety-conscious detail.
- Choose Activity-Appropriate Fabrics: Avoid very slippery materials for children’s capes, and make sure all embellishments are firmly attached.
By focusing on length and visibility, you make a garment that’s both safe and stunning. This careful planning lets everyone enjoy their fantasy with confidence.
Care, Storage, and Re‑wear Ideas
Your no-sew cape is a valuable part of your costume collection. It needs gentle care to stay in great shape for years. This keeps its magical look alive.
For fabrics like fleece or satin, a damp cloth is best for spot-cleaning. Always let it air-dry flat for at least 24 hours. Check out care tips for different materials to keep it lasting.
Keep your cape in a bag that lets air through. Lay it flat to prevent wrinkles. Avoid using wire hangers, as they can harm the fabric and damage trims.
A handmade cape is incredibly versatile. It can transform into many characters. Change the closure from ribbons to toggles for a fresh look. Add grommets for a laced effect. This year’s vampire cloak can become next year’s wizard robe with different accessories.
This way, your cape is a smart investment. With proper care, it can be worn many times for different events and themes.