
Imagine turning into a sea creature with grace. The secret to this magical look is comfort through mobility. It all starts before you even begin sewing.
Choosing the right material is key. Go for stretch fabrics like spandex or four-way knits. These fabrics move with you, making it easy to walk and sit.
For longer wear, a breathable liner is essential. It keeps you dry and prevents that annoying stickiness.
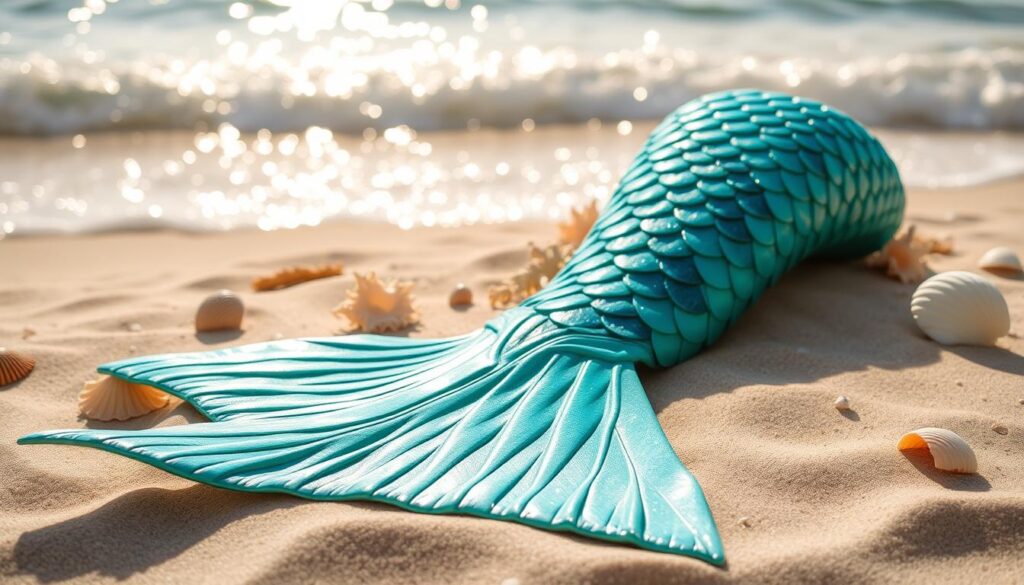
The heart of your project is a mermaid tail pattern. Think of it as your guide. A good mermaid tail pattern makes sure your tail is both beautiful and comfortable to wear.
Tail Styles: walkable skirts, swim tails, photo‑only fins
Not all mermaid tails are the same. The best one for you depends on how you plan to use it. Are you walking in a parade, swimming, or posing for photos? We’ll look at the three main tail shapes for your activity.
The walkable skirt tail is great for land. It’s made for moving around easily. Imagine a skirt that flares out or has a slit for walking, sitting, and dancing.
It’s perfect for costume parties, conventions, or a magical walk by the sea. You can use many fabrics, like chiffon or cotton, because you won’t be in the water.
The swim tail is best for water lovers. It’s made for swimming. It often has a pocket for a monofin, which helps you swim faster.
Choose lightweight, quick-drying materials like swimsuit lycra or neoprene. The fit should be snug but not tight. Always swim with a friend when wearing a tail.
The photo-only fin is for dramatic photos. These tails are made for looks, not for swimming. They have big, stiff shapes that look amazing in photos.
For these tails, materials like sequin knit are perfect. They add glamour and depth to photos. You can use heavier, more decorative fabrics and fancy designs.
Below is a table to compare the main features of each mermaid tail style. It helps you choose the right one before you start making it.
| Tail Style | Primary Use | Key Design Features | Material Considerations |
|---|---|---|---|
| Walkable Skirt | Land-based events, parties, parades | Flared or slit design for leg mobility, often ankle-length | Comfortable fabrics like cotton, jersey, or stretch velvet; durability is key |
| Swim Tail | Swimming, underwater photography | Streamlined shape, monofin pocket, secure closures | Swimsuit lycra, neoprene; chlorine-resistant and quick-drying |
| Photo-Only Fin | Static photography, artistic portraits | Large, dramatic fin shapes; often stiffened for hold | Decorative fabrics like sequin knit, metallic vinyl, or layered tulle for texture |
Remember, these are just starting points. You can mix things up, like adding a sequin knit panel to a swim tail. Knowing these styles ensures your mermaid project is beautiful and fits your plans.
Drafting/Sew‑Free Builds with Fin Stiffeners
Fin stiffeners are a secret for making a structured mermaid fin without sewing. They are great for busy people or those new to costume making. You can get a professional look with simple materials and smart techniques.
Instead of sewing, use adhesive or existing clothes. Fabric glue and fusible tape make strong, flexible seams. You can also use an old skirt or leggings as a base. This method is quick, safe, and makes mermaid magic accessible to all.

So, what are fin stiffeners? They are inserts that give your tail its shape and support. Think of them as the skeleton of your fin. You can use plastic boning, flexible vinyl, or craft foam. Each offers a different mix of flexibility and support.
Adding these stiffeners is easy. Just follow these steps for a perfect build:
- Prepare Your Fabric: Cut your tail fabric to the right length and shape. If using a repurposed garment, lay it flat.
- Mark the Channel: On the inside of the fabric, draw a vertical line down the center where the fin will be. This is where the stiffener will go.
- Create the Pocket: Apply fabric glue or bonding tape along the edges of this line. Fold the fabric over and press to create a sealed pocket. Leave the top open.
- Insert the Stiffener: Slide your chosen stiffener material into the pocket. Make sure it goes from the top of the fin to the very tip.
- Secure the End: Add a final dot of glue or a piece of tape at the top opening to prevent the stiffener from sliding out. Let everything dry completely.
Choosing the right stiffener material is key to your tail’s movement and look. The table below breaks down the most common options to help you decide.
| Material | Flexibility | Best For | Pro Tip |
|---|---|---|---|
| Plastic Boning | Medium – Holds shape well but can bend | Walkable skirt tails or swim tails | Cut with sharp scissors and sand edges smooth. |
| Flexible Vinyl | High – Flows with movement | Dramatic, flowing photo fins | Available in clear or colors from craft stores. |
| Craft Foam | Low – Provides rigid structure | Stationary photo-only fins | Layer two sheets for extra thickness and paint. |
For more inspiration on adhesive-based projects, explore our guide on no-sew costume builds. It’s filled with fast, safe projects perfect for time-crunched parents.
With the right fin stiffeners and a bit of fabric glue, you can make a stunning mermaid tail. This sew-free method makes a beautiful, structured fin accessible to everyone.
Tops: shell corsage, bandeau, modest options
A shell top is key to any mermaid-inspired outfit. It’s all about the ocean, with pearlescent finishes and iridescent fabrics. Delicate silhouettes add to the charm.
Your top sets the tone for your look. It can be a whimsical touch or a bold statement. We’ll look at three styles for different skill levels and comfort needs.
Crafting a Delicate Shell Corsage
A shell corsage adds a natural beauty to your look. It’s like seashells arranged as a floral piece. It’s great for photos or a light, easy costume.
Begin with a bralette or camisole. Use craft foam or clay to shape shells. Paint them with metallic or pearlescent acrylics for shine.
Glue or sew the shells onto your base. Add faux pearls or sequins for extra sparkle. Your handcrafted corsage will be a stunning focal point.
Constructing a Simple Bandeau
The bandeau is simple yet effective. It’s perfect for swim tails or active wear. It’s easy to make and covers well.
Choose stretchy fabric like lycra or spandex. Cut a rectangle to wrap around your torso. A wider bandeau offers more modesty.
Sew or fuse the ends for a tube. You can keep it plain or add shimmering scales. An iridescent fabric makes it pop.
Ideas for Modest Coverage Options
Not everyone wants a bare midriff. Modest styles are stylish and creative. They often involve layering and clever materials.
Try a high-neck lace top under a shell corsage. A crocheted net shirt looks like seaweed. A sea-green or blue leotard is a great base.
You can also decorate a tankini or rash guard. Use fabric paint, glitter, or scale patterns. Keep the ocean theme while staying comfortable.
https://www.youtube.com/watch?v=qlaVezSs-Ak
To capture the mermaid core look, focus on texture and shine. Use pearlescent buttons, iridescent ribbons, and sequins. These details shimmer like the ocean.
| Style | Difficulty Level | Key Materials | Best For |
|---|---|---|---|
| Shell Corsage | Intermediate | Craft foam, pearls, glue, base top | Photo shoots, lightweight wear |
| Bandeau | Beginner | Stretchy fabric (lycra), scale appliqués | Swimming, active costumes |
| Modest Options | Beginner to Intermediate | Leotard, lace, fabric paint, netting | Full coverage, layered looks |
Each top style lets you express yourself. You can mix styles for a unique look. A bandeau can be worn under a sheer, modest overlay for a special effect.
The shell top is your canvas. Let trends inspire you, but always follow your vision and comfort. Your mermaid look is waiting to be created.
Accessories: seaweed boa, trident, pearl crown
Accessories make your mermaid look pop. The mermaid core trend loves pearls, shells, and flowing textures. Making your own sea accessories is fun and adds depth to your character.

Three key pieces will transform you: a seaweed boa, a trident, and a pearl crown. They’re great DIY projects for all skill levels.
Crafting a Flowing Seaweed Boa
This boa looks like underwater plants. You don’t need to be a pro at sewing.
Get green and blue ribbons, tulle, or fabric scraps in different lengths. Tie them to a long yarn or thin belt with knots. Add glitter or small, fake pearls for extra sparkle.
The result is a light, beautiful accessory. It drapes well over shoulders or arms. It’s one of the simplest sea accessories to make.
Building a Regal Trident Prop
A trident shows power and magic under the sea. Making a safe, light prop is easy.
Use a cardboard tube or wooden dowel as the staff. Cut a three-pronged head from cardboard or foam board. Glue or tape it to the staff.
Paint it with metallic blue, silver, or gold paint. Dry brush with iridescent glitter paint for a magical glow. This prop is great for photos and adds power to your look.
Designing a Pearl Crown
No mermaid look is complete without pearls. A pearl crown adds a regal, oceanic touch.
Start with a plain headband. Use hot glue to attach faux pearls and seashells. Arrange them in clusters or a line along the band.
You can also braid pearl strands for a tiara effect. This accessory ties your outfit together with a focus on pearls and shells.
| Accessory | Key Materials | Difficulty Level | Estimated Time |
|---|---|---|---|
| Seaweed Boa | Ribbons, tulle, yarn, faux pearls | Beginner | 30 minutes |
| Trident Prop | Cardboard tube, foam board, metallic paint | Intermediate | 1-2 hours |
| Pearl Crown | Headband, faux pearls, seashells, hot glue | Beginner | 45 minutes |
As the table shows, each project is easy. Making these sea-inspired details is fun and rewarding.
By making your own seaweed boa, trident, and pearl crown, you add magic to your mermaid character. These DIY sea accessories make your look unique, cohesive, and enchanting.
Body Paint & Glitter Safety (Reef‑Safe, Non‑Toxic)
Before you start painting, it’s key to know about body paint safety. It’s not just about avoiding stains. It’s about keeping your skin safe and protecting our oceans.
Always pick products made for skin use. Look for “non-toxic,” “hypoallergenic,” and “FDA-compliant” labels. Stay away from craft glitters and acrylic paints. They can have sharp plastics and harmful chemicals.
- Cosmetic-Grade Glitter: It’s made from soft, rounded materials like synthetic fluorphlogopite or cellulose. It’s gentle on your skin.
- Reef-Safe & Biodegradable: This is key for any shoot near water. These glitters dissolve naturally without harming sea life.
- Professional Body Paints: These brands are made for face and body art. They offer bright, easy-to-blend colors that are safe for your skin.
Keeping our oceans safe is a must. Traditional plastic glitter harms our waters. Choosing biodegradable glitters shows you care for the environment, just like your mermaid character.
This careful choice makes sure everyone can have fun safely. It follows the rules of non-toxic play. Your creation should be as safe as it is beautiful.
See this step as the base of your art. True enchantment comes from confidence. Knowing your look is beautiful inside and out.
Location & Photo Tips (shore, pool)
Whether by the shore or in a pool, the environment shapes your mermaid look. The right setting does more than provide a backdrop. It interacts with your costume, pose, and light to create magic.
Your two primary location choices offer distinct advantages. A natural shoreline provides dynamic, ever-changing light and authentic textures. A swimming pool offers a controlled, predictable environment with consistent water clarity.
| Factor | Shoreline Location | Pool Location |
|---|---|---|
| Lighting | Golden hour sunlight, dappled effects | Even, controlled artificial or midday sun |
| Backdrop | Rocks, sand, waves, horizon | Clean water, pool edge, possible props |
| Water Clarity | Variable (can be murky) | Consistently clear |
| Practicality | Weather-dependent, more logistics | Private, accessible, temperature-controlled |
For stunning photos, your posing is key. Showcase the tail’s long, flowing lines. Extend your legs and point your toes for a seamless silhouette. Capture movement by gently swishing the tail in the water just before the shot.
Try these effective poses:
- Floating on your back: Creates a serene, ethereal look with the tail drifting on the surface.
- Partial submersion: Sit on a rock or pool step with the tail cascading into the water.
- Dynamic kick: Have a photographer capture the moment a fin breaks the water’s surface.
Your choice of material plays a huge role in how light interacts with your look. A reflective scale fabric can become the star of your photos. Under the brilliant sun at the shore, this material will sparkle and shimmer with every ripple.
In a pool setting, underwater lights or even a bright poolside lamp can make the same scale fabric glow from within. The controlled light allows you to highlight specific scales or create a soft, even sheen across the entire tail.
Remember, the goal is harmony between your costume and its environment. Let the location enhance your creation, and use these tips to capture the enchantment forever.
Care & Storage
Your handmade mermaid tail is a labor of love. Keeping it in good shape means it will last for many adventures.
Wash delicate fabrics and scales in cool water with a mild detergent. Dry them flat, away from sunlight. For body paint and glitter, use a gentle oil-based remover. Always pick reef-safe and non-toxic cleaners for easy cleaning.
Storing your tail right keeps it looking new. Hang fabric tails on padded hangers. Roll tails with scales to avoid damage. Store accessories like pearl crowns in boxes with acid-free tissue paper.
Think about your fin’s maintenance. Rigid monofins need special care. Many prefer soft fabric fins or other alternatives for easier storage and care.
Follow these care tips to keep your DIY tail looking great. Enjoy wearing it for many magical moments.