
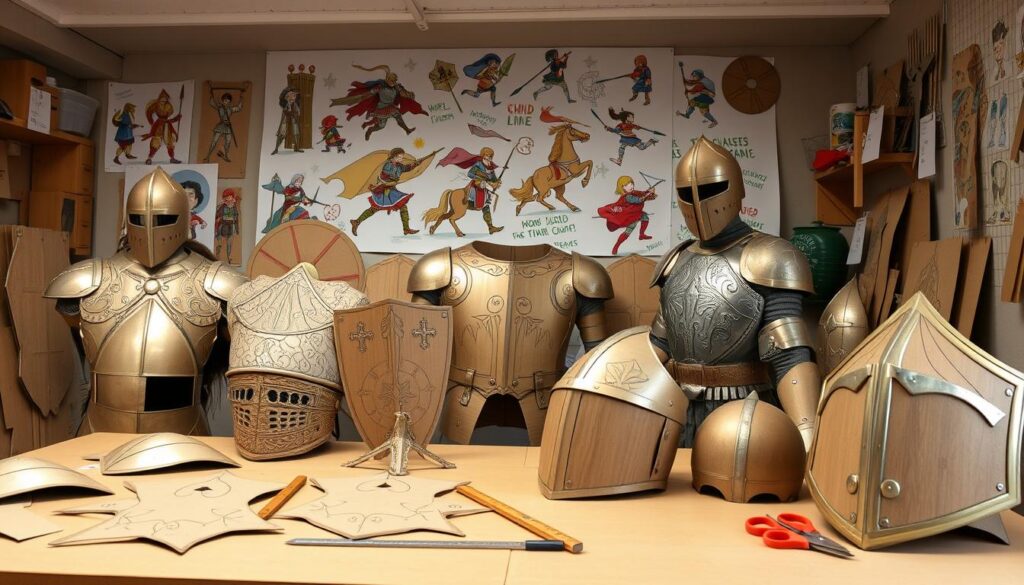
Imagine turning simple cardboard into amazing wearable art. This craft lets you become a hero from classic tales. You can be a strong knight, a quick elf ranger, or a grand royal guard.
Each character has its own design challenge. Knights need bold shapes and shiny details. Rangers go for earthy colors and smooth, useful designs. Royal guards aim for polished looks and a commanding presence.
Often, the idea starts with creative party themes. These events show how fantasy looks can become real, wearable pieces. The magic happens when a simple sketch turns into a finished work.
With the right help and printable templates, anyone can make something amazing. It’s not just about making a costume. It’s about building confidence and bringing your creative dream to life.
Templates & Pattern Pieces
The secret to a professional-looking cardboard breastplate or shield is the pattern. A precise template is like a blueprint for your project. It makes the difference between a flimsy costume and a sturdy, battle-ready one.
You don’t have to start from scratch. Many templates and pattern pieces are available:
- Online Craft Communities: Sites like Pinterest and Etsy offer many free or low-cost templates.
- Historical References: Look at images of real medieval armor and shields. Simplify the complex curves into basic, cuttable shapes.
- Children’s Coloring Books: Simple, bold outlines of knights and crests can be perfect starting points for a shield pattern.
- Vector Graphic Software: Programs like Inkscape (free) or Adobe Illustrator allow you to create and scale perfect, symmetrical designs.
Scaling is key. A pattern for a child won’t fit an adult. Use a grid to scale up your design. Draw a grid over your original template and a larger grid on a big piece of cardboard. Copy the design square by square.
For digital files, adjust the print scale in your printer settings. Large pieces may need printing across multiple pages and assembling.
Now, let your creativity shine, mainly in shield design. Will you make a classic kite shield or a rounded heater shield? Draw inspiration from noble characters and their heraldry. A bold crest with a symbolic animal might suit a knight like Sir Cameron. A shadowy figure like Sir Rufus might inspire a minimalist, monochromatic shield pattern.
Transferring your pattern to cardboard needs care for clean results. Use a pencil or dressmaker’s chalk for initial outlines. For symmetrical pieces, fold your cardboard in half and cut through both layers. This ensures identical left and right sides. Always use a sharp utility knife against a metal ruler for straight lines and a cutting mat to protect your surface.
By spending time on planning and pattern, every step—cutting, joining, decorating—will go smoothly. You’ll end up with functional, impressive pieces that look like they came from a royal armory, not your recycling bin.
Cutting, Scoring, and Curving Techniques
Think of your utility knife as a blacksmith’s hammer. Each cut shapes and strengthens your final piece. Like Steel Sterling, your success depends on precision. This stage turns flat sheets into contoured armor pieces.
Mastering these techniques is key. It makes the difference between a flimsy prototype and strong armor.
You’ll need a sharp utility knife or box cutter, a metal ruler, and strong scissors. A self-healing cutting mat is essential. It protects your work and gives your blade a firm base. Remember, safety is the foundation of every good build.
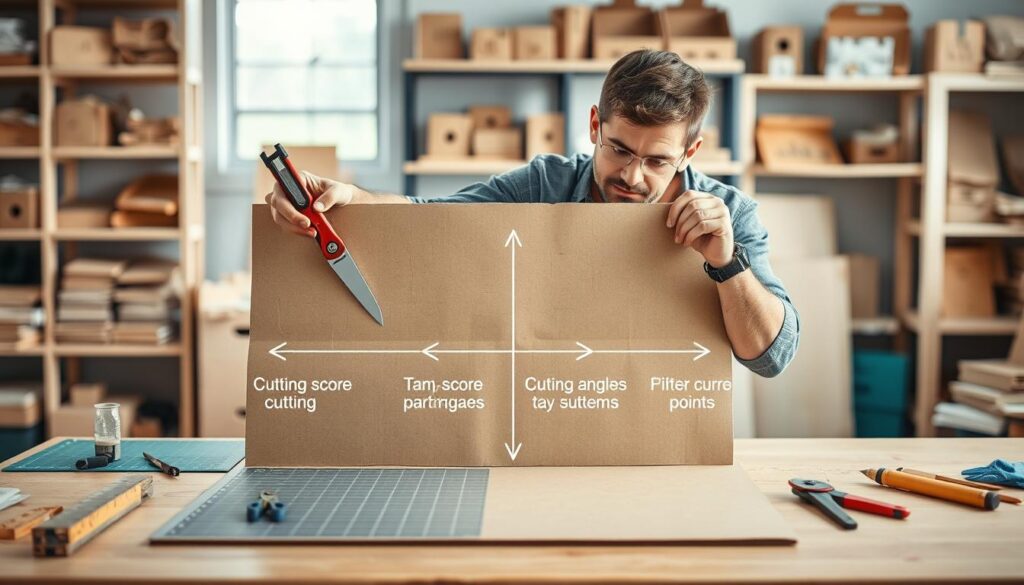
Following strict box cutter safety rules prevents accidents. It ensures clean work. Always treat every blade with respect.
- Always use a retractable blade and keep it retracted when not actively cutting.
- Keep your free hand well away from the cutting path, using the ruler as a barrier.
- Make several light passes instead of one heavy cut to avoid slipping.
- Replace dull blades immediately; a sharp blade is safer and more controllable.
For straight cuts, clamp your ruler along the marked line. Hold the knife at a consistent angle. Draw the blade along the ruler’s edge with steady pressure. Repeat until the cardboard separates cleanly.
Scoring is key for curves. It cuts partway through the top layer to create a hinge. Use the back of your knife or a blunt butter knife. Run the tool along your curve line with firm pressure. You’ll see a visible indentation without cutting through.
Once scored, gently bend the cardboard along the line. It will curve smoothly, holding its shape. For tighter curves, make parallel score lines close together. This gives you control over complex shapes, like real plate armor.
Combining safe cutting and precise scoring leads to professional results. Your armor will look crafted, not hacked. The patience of a blacksmith in this stage pays off with stunning and structurally sound armor.
Joining: glue, tape tabs, paper fasteners, hidden seams
A knight’s armor needs strong seams to last. The joining phase is key for both strength and looks. The right method turns cut pieces into a solid suit that moves well and looks great. This is like making party decorations and costumes, where simple, reliable methods are best.
Choose based on what you need: a strong bond or something you can adjust. Let’s look at the main methods.
| Method | Best For | Key Strength | Consideration |
|---|---|---|---|
| White Glue (PVA) | Permanent seams on flat, overlapping edges. | Creates a very strong, clean bond once fully cured. | Requires clamping or pressure while drying; not instant. |
| Hot Glue | Quick assembly, bonding odd angles, and adding 3D details. | Sets in seconds, filling small gaps effectively. | Can create visible strings; bonds can become brittle in cold temps. |
| Tape Tabs | Joints you may need to disassemble or adjust for sizing. | Allows for non-permanent, flexible connections. | Use strong packing or duct tape; can be visible if not planned. |
| Paper Fasteners | Creating functional pivots, like for shoulder pauldrons or knee plates. | Provides genuine articulation for realistic movement. | Reinforce the fastener hole with a small cardboard washer to prevent tearing. |
For a clean look, master the hidden seam. This means joining pieces from the inside so the seam isn’t seen. Score and fold a thin flap along the edge of one piece. Apply glue to this flap and press it against the inside surface of the other piece. This makes the outside surface smooth and uninterrupted.
For detailed work, use thinner cardboard. Material from a cereal box armor project works well. It’s flexible and easy to cut, perfect for details that don’t need to be thick.
- Ornate Overlays: Cut out designs and glue them onto your main plates for decoration.
- Functional Hinges: Make small, flexible strips to connect moving armor parts without heavy hardware.
- Reinforcing Pieces: Add small patches behind stress points, like paper fastener holes, to prevent tearing.
By choosing the right joining method for the task, your armor will be strong and look great.
Strapping & Sizing for Mobility
Imagine Glen Gallant, the loyal squire, or Daring Darby, the cunning one. Both needed armor that let them move freely. Their gear had to keep up with their actions, whether noble or sneaky.
Wearable costume armor must be both beautiful and functional. It should make the wearer feel like a true knight, not trapped in their own armor.
Proper strapping and sizing are key to this. They turn static cardboard into a dynamic costume. The wearer should be able to move freely, without the armor twisting or falling off.
Designing Your Strapping System
Strapping holds your armor in place. It should be secure but not too tight. You don’t want it to restrict breathing or slide around.
There are three main materials for strapping, each with its own benefits and drawbacks. Choose based on the armor piece and the wearer’s needs.
Elastic straps stretch and give. They’re great for areas that need to move, like under the arms or at the knees. They fit snugly, accommodating slight size changes.
Hook-and-loop tape (like Velcro) is adjustable and easy to use. It’s perfect for pieces that need to be taken off quickly or for growing kids.
Cloth straps with buckles or ties offer a medieval look. They allow for precise tightening. Use them for major parts like a breastplate or greaves.
Attach straps to the inside of your armor with strong glue or by sandwiching them between glued cardboard layers. Place straps at key mobility points: over the shoulders, around the biceps, and across the back.
| Strapping Type | Ease of Adjustment | Hold Strength | Best For |
|---|---|---|---|
| Elastic Straps | Medium (pre-set stretch) | High (constant tension) | Limb armor, underarm areas |
| Hook-and-Loop (Velcro) | Very High (fully adjustable) | Medium to High | Chest plates, removable pieces, kids’ armor |
| Cloth Straps with Buckles | High (incremental adjustment) | Very High (secure lock) | Main torso armor, authentic detailing |
Mastering Sizing and Measurement
Even the best strapping can’t fix a poorly sized armor. Taking accurate measurements is essential. You only need a soft measuring tape.
For a breastplate, measure around the widest part of the chest. For arm guards, measure around the bicep and from shoulder to wrist. For leg pieces, measure the thigh, calf, and from hip to ankle.
Add at least one to two inches to these measurements. This ensures comfort and movement space. Cardboard needs more room than fabric.
Transfer these measurements to your paper templates before cutting cardboard. Scale the template pieces up or down as needed. It’s easier to adjust a paper pattern than to rebuild a cardboard piece.
For children, make straps extra long or use generous Velcro patches. This allows for growth throughout the costume season.
The result of this careful work is immense. A well-sized and strapped suit feels confident and secure. It turns play-acting into an immersive experience where the armor is a part of the knight, not an obstacle. That is the true mark of a craftsman.
Metallic Finishes: brush paint, rub‑n‑buff effects, weathering
You can give your cardboard a shiny, metallic look without spray paint. This turns simple cardboard into something that looks like ancient steel. The right finish makes your costume pop in photos, giving it a heroic vibe. We’ll look at spray paint alternatives that are better for indoor use and offer more control.

Brush Painting with Acrylics is a key technique. It lets you control the color, starting with a gray or brown base. Then, apply metallic paint in thin layers with a synthetic brush. This method avoids drips and gives a smooth, realistic metal look.
Rub-‘n-Buff Wax adds an aged metal look instantly. It comes in colors like “Antique Gold” or “Silver Leaf.” Rub it on raised areas with your finger or a cloth. This creates depth and a vintage look in minutes.
Weathering Techniques make your armor look battle-worn. Dry brushing uses a paint-covered brush to highlight edges. Washes are thin, dark paints that fill in crevices, adding shadows and grime.
Combining dry brush highlights with washes creates amazing depth. This makes your armor look heavy and used. Weathering tells a story, adding history to your costume.
| Technique | Best For | Tools & Materials | Key Visual Effect |
|---|---|---|---|
| Brush Painting | Creating solid, even base coats of metallic color. | Acrylic paints, synthetic brushes, palette. | Uniform metallic sheen and coverage. |
| Rub-‘n-Buff Wax | Instant aging and highlighting raised details. | Rub-‘n-Buff tubes, soft cloth or finger. | Antique, tarnished look with quick depth. |
| Dry Brushing & Washes | Simulating battle damage, wear, rust, and grime. | Dry brush, dark acrylic/ink, water, paper towels. | Realistic texture, shadows, and a worn, historic feel. |
These methods are not just spray paint alternatives; they’re often better for details. They’re safe to use indoors without fumes or overspray. Mastering brush painting, rub-‘n-buff, and weathering turns cardboard into a masterpiece.
Shield & Sword Add‑ons
Choosing between foam and cardboard for arms is key for safety and durability. Every knight, like Sir Cameron and Sir Rufus, needs their special weapons. You’re like the blacksmith Steel Sterling, making these vital items.
What you pick depends on your project’s aim. Is it for fun, safe play or a detailed display piece? This foam vs cardboard guide helps you decide.
| Feature | Foam (Pool Noodles, Sheets) | Cardboard (Layered, Corrugated) |
|---|---|---|
| Best For | Swords, light shields for kids | Durable shields, detailed prop builds |
| Safety | High – soft, flexible, impact-friendly | Medium – requires edge smoothing |
| Weight | Very light | Moderate to heavy |
| Detail Possible | Lower, best for simple shapes | High, excellent for painting and texture |
| Durability in Play | Good, may dent or tear | Excellent, holds shape well |
For a classic shield, layered cardboard is the best. It gives a solid base for designs. You can follow a great tutorial to make a knight’s shield using this method.
Build a Cardboard Shield:
- Cut two identical shield shapes from sturdy corrugated cardboard.
- Glue them together for thickness. Let dry completely under weight.
- Cut a long strip of cardboard for the handle. Curve it into a “D” or “U” shape.
- Attach the handle to the back using strong glue and reinforce with packing tape.
- Cover the front and edges with paper mache or masking tape for a smooth painting surface.
For swords, foam is safer, great for young knights. A pool noodle is perfect for the core.
Build a Foam Sword with Reinforced Core:
- Cut a pool noodle to your desired sword length.
- For extra rigidity, insert a dowel rod or a tightly rolled tube of cardboard into the noodle’s center.
- Carve the foam to shape a point and crossguard using a sharp craft knife.
- Wrap the handle area with duct tape or grip tape for a secure hold.
- Seal the entire foam surface with Plasti Dip or a flexible sealant before painting.
The foam vs cardboard debate is about your goal. Pick foam for fun, safe fights. Choose layered cardboard for a shield that looks and feels like it’s crafted for battle. With these steps, your knight will be ready for any quest.
Safety (Edges, Visibility, Rain‑Proofing)
Safety is key in crafting, making sure you can have fun without worry. A good cardboard armor set should make you feel confident. Focus on three main areas: edge safety, visibility, and weather resistance.
First, we need to deal with sharp edges. Cut cardboard can be quite rough. Here are three ways to make them safer:
- Sanding: Use medium-grit sandpaper to smooth out edges. This makes the cardboard soft and safe.
- Tape Coverage: Wrap strong cloth or duct tape over edges. It creates a tough, flexible shield.
- Foam Tubing: Cut foam pipe insulation and wrap it around edges. It’s great for protecting shoulders or shield rims.
Next, think about visibility. A helmet is important, but bad eye-slits can be a problem. Make sure openings are much wider than you think. Test them by having the wearer look straight and to the sides. Slits should be at least one inch tall and two inches wide for each eye. This keeps the armor look while ensuring clear vision.
Lastly, protect your armor from the weather. Even indoor events can get messy. Sealing your cardboard armor is a must for lasting wear.
Here’s a quick comparison of popular sealant options:
| Sealant Type | Best For | Application Notes | Dry Time |
|---|---|---|---|
| Mod Podge (Gloss or Matte) | Overall protection & paint sealing | Brush on in thin, even coats. Creates a durable film. | 15-20 minutes per coat |
| Clear Acrylic Spray | Quick, even coverage; weather resistance | Use in a well-ventilated area. Apply light, misting coats to avoid drips. | 10-15 minutes per coat |
| Water-Based Polyurethane | Maximum durability & moisture barrier | Brush on. Can slightly darken paint, so test first. | 30 minutes – 2 hours |
Two thin coats of any sealant are better than one thick coat. It protects your armor from fingerprints and light rain. It also makes it stronger against accidental damage.
By taking these steps, your project becomes a lasting piece of art. You’ll feel confident knowing your cardboard armor is safe, comfy, and ready for anything.
Photo Posing & Battle‑Ready Styling
Your cardboard armor comes to life with the right pose and style. Dynamic photos tell the story of your knight.
Hold your shield at an angle to show its design. Grip the sword with purpose, elbow bent for action. Stand with feet apart, shoulders back, to project confidence. For group shots, create a defensive line or a roundtable council, drawing inspiration from knight party photos.
Focus the camera on upper-body details. A detailed collar, vest, or ornate cuffs adds depth when seated. Visual storytelling elements like faux gears or a pocket watch can enhance the aesthetic. For ideas on incorporating mechanical motifs, consider styles discussed in resources about steampunk fashion for children.
Use props and a simple backdrop to set the scene. The weathered finish on your cardboard armor will look authentic under natural light. Every pose should feel strong and ready.
Now you possess the knowledge to build, finish, and showcase your armor. Go forth and create your visual legend.